
How to Fix SOS Only on iPhone
Have you ever faced the frustrating issue of your iPhone being stuck in SOS Only mode? Well, you’re not alone. The SOS Only issue on iPhone can result in us being unable to use the most basic functions of our smartphones, such as making calls and surfing the internet. No, I’m not talking about some sort of apocalypse. This can happen now.
So, let’s dive into this blog post to understand how to fix the SOS Only issue on iPhone, how to fix sos only on iphone, how to get phone out of sos mode.
Learn More
Table of Contents
Understanding SOS Only on iPhone
SOS Only mode is triggered when there’s a critical emergency or when we need emergency services. This mode restricts certain functionalities such as phone calls and internet access to ensure that only essential features remain active. To put it into perspective, it serves as a safety measure to prevent accidental interference during critical situations.
When I try to use my iPhone, it says SOS Only. Why?
The iPhone displaying the message “SOS Only” can be perplexing for users. This document aims to provide an explanation as to why this error occurs and what you can do to resolve it.
First and foremost, it’s natural to question something that you haven’t encountered before. When your iPhone shows SOS Only, it means that you won’t be able to make regular calls, send SMS texts, or use cellular data. This blocking of network services appears as a notification in the top-right corner of the control center in iOS 17/16 and the top left corner in previous versions.
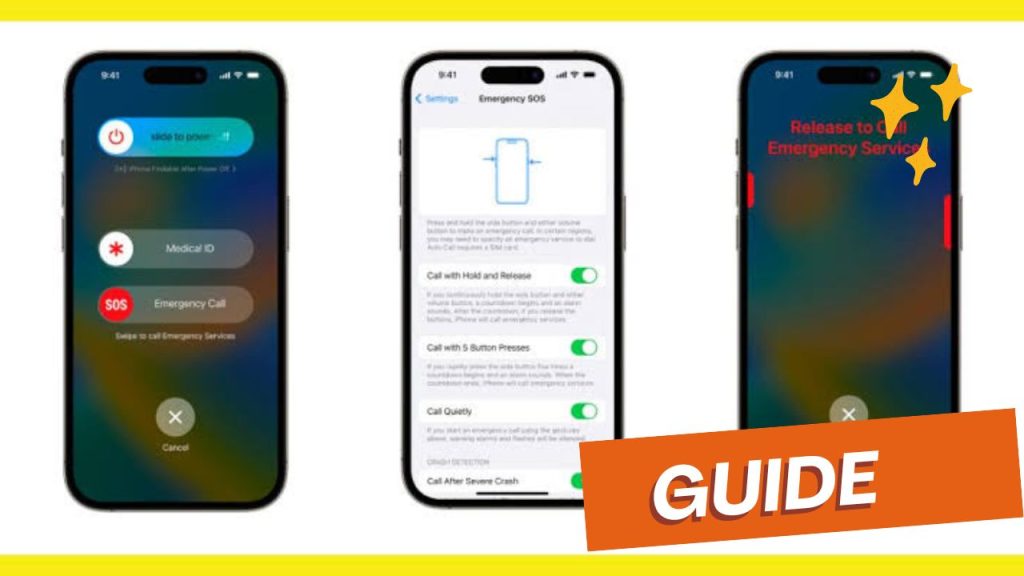
Despite this limitation, you can still utilize Emergency SOS to call concerned authorities. However, it’s important to note that the Emergency SOS service is currently only available in the United States, Europe, Canada, and Australia.
There are several reasons why your iPhone might display the SOS Only error:
1. Out of Carrier Coverage Area: If you’re in an area with poor network coverage, your iPhone may not be able to establish a reliable connection. This can lead to the SOS Only error being displayed.
2. Bad Network Reception: If you encounter poor network reception, your iPhone may struggle to establish regular calls, texts, and cellular data usage. As a result, the SOS Only error may appear.
3. Old Device: If your iPhone is an older model, it may not support the features and functionalities required to use regular network services. This can result in the SOS Only error being displayed.
4. No Active Cellular Plan: If your iPhone doesn’t have an active cellular plan, you won’t be able to make regular calls, send texts, or use cellular data. The SOS Only error may appear as a reminder to activate a plan.
In addition to the above reasons, we also have a guide for no-service issues on iPhone if you are experiencing this issue instead of SOS Only on iOS 17/16.
In conclusion, the iPhone displaying SOS Only can be frustrating, but it’s important to understand that this error can occur due to various reasons, such as being outside the carrier coverage area, experiencing bad network reception, using an old device, or not having an active cellular plan. By addressing these issues, you can resolve the issue and regain access to regular network services.
Fixing the SOS Only Issue on iPhone
Here are a few steps you can take to troubleshoot and fix the SOS Only issue on your iPhone:
1. Enable roaming on iPhone:
When planning to travel outside of town, state, or even internationally, it is essential for you to turn on roaming on your iPhone. By doing so, your network provider will be able to provide a cellular connection and assist you in turning off SOS Only. However, please note that some cellular service providers may charge additional fees for roaming.
To activate roaming on your iPhone:
– Open the Settings app on your device.
– Tap on Cellular/Mobile Data.
– Select Cellular/Mobile Data Options.
– Toggle on Data Roaming.
By enabling roaming, you enable your iPhone to establish and maintain a connection to a cellular network while outside your designated area. This can potentially help resolve the SOS Only issue.
Make sure to review any roaming charges or fees imposed by your network service provider before traveling.
2. Update carrier settings on your iPhone
In order to enhance your cellular connectivity and overall network performance, it is important to periodically update the carrier settings on your iPhone. This fix has a good chance of bringing back 5G functionality on your device.
3. Turn ON/OFF Cellular Data
In situations where a SIM card is inserted and cellular network service is not accessible, there may be a minor problem with your iPhone. In such cases, you can try to toggle off Cellular Data and then turn it back on again. By doing so, you may be able to resolve the issue. Here are the steps to follow:
Open the Control Center and tap on the Cellular Data icon to turn it off. Wait for a few seconds, then tap on it again to re-enable data.
Alternatively, you can follow these steps:
Open Settings.
Tap Cellular/Mobile Data → Toggle off Cellular/Mobile Data.
Wait for some seconds, and then Toggle on.
By following these simple steps, you may resolve the issue and regain cellular service on your iPhone.
4. Switch to 4G or LTE
If you are experiencing issues with your new iPhone displaying “SOS Only” after activation and you are using 5G, it may be due to this new technology still being optimized by cellular companies. It is recommended to remain in 4G or Auto mode until the widespread availability of 5G. If the problem persists, switching to 4G or LTE could be a potential solution.
5. Turn on/off Airplane Mode
This quick fix allows you to quickly restart your wireless connection, apart from Bluetooth. To perform this action, follow these steps:
Open Control Center on your iPhone and tap the Airplane icon.
Wait for a few seconds before toggling it off.
Alternatively, you can also access Airplane Mode by going to Settings > Airplane Mode.
By turning Airplane Mode on and off, you can try to restart your wireless connection and see if the issue persists.
6. Disable or enable automatic Network Selection
The automatic network selection feature on your iPhone helps your SIM card connect to the most appropriate network. However, there may be instances where it takes longer than usual to determine the correct network. To solve this issue, you can disable and re-enable automatic network selection on your iPhone. This process may reestablish the connection and potentially resolve the SOS only issue.
To disable automatic network selection, follow these steps:
1. Open Settings on your iPhone.
2. Scroll down and select Cellular/Mobile Data.
3. Tap on Network Selection.
4. Toggle off the switch next to Automatic.
After a few seconds, you can toggle the automatic network selection back on by following these steps:
1. Open Settings on your iPhone.
2. Scroll down and select Cellular/Mobile Data.
3. Tap on Network Selection.
4. Toggle on the switch next to Automatic.
Please note that these steps may vary depending on the version of iOS you are using.
7. Re-insert SIM card
Although rare, network connectivity can also be affected by a physical SIM card error. In such cases, you can try removing the SIM card from your iPhone and reinserting it. However, if you are using eSIM on your iPhone, do not reset it unless your carrier advises you to do so.
By following these steps, you should be able to resolve the SOS only issue on your iPhone. However, if you continue to experience problems, it is recommended to contact your network operator or Apple Support for further assistance.
8. Reset network settings on iPhone
If none of the previous methods have worked in turning off the SOS Only feature on your iPhone, it may be necessary to erase all previously saved connections and reset the network settings. This will completely erase the data related to connected Bluetooth devices, Wi-Fi passwords, VPN configurations, and any other network settings, including SOS Only.
To perform this reset, follow these steps:
1. Open the Settings app on your iPhone.
2. Scroll down and select General.
3. Scroll down again and select Transfer or Reset iPhone.
4. Choose Reset → select Reset Network Settings.
5. Enter your passcode.
6. Select Reset Network Settings.
Once the network settings are reset, your iPhone will restart and reconnect with the previously saved networks. This process should hopefully solve the issue with SOS Only.
9. If you are connected to a 3G network
With the advent of 5G and the advancements made with the 4G network, many cellular service providers have begun to phase-out their 3G mobile services and allocate these resources elsewhere. As a result, the following devices may experience SOS Only status:
– iPhone 5s, iPhone 5c, or earlier
– iPad 2 Wi-Fi + Cellular or earlier
If you own an iPhone 6 or an iPad (3rd generation) or later but have not updated your device, it is crucial to do so immediately. If the update does not resolve the issue, you may need to seek out an upgrade.
10. Check for an outage
Just like Wi-Fi service providers, cellular service providers may experience outages for various reasons, including planned maintenance, damaged cell towers, network congestion, or other factors.
If your provider is facing an outage, your iPhone may indicate SOS Only status. Unfortunately, there is no specific fix available for this situation, and you will simply have to wait for service to be restored.
Conclusion
The SOS Only issue on iPhone can be frustrating, but it doesn’t necessarily mean the end of the world. By following the steps outlined in this blog post, you should be able to rectify the issue and restore your iPhone to its normal functioning. Remember, patience is key!


