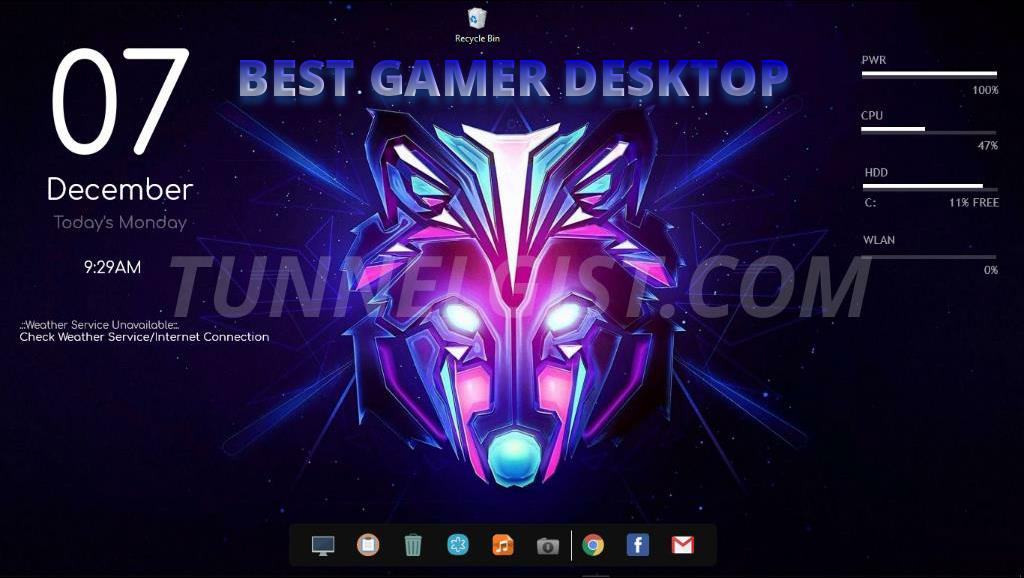
Hi, do you want to get the best and unique design on your desktop (Windows PC)? I mean a very beautiful and unique icon arrangement for gamer’s, bloggers, and more. In this tutorial, we will show you the easy steps to Customize your desktop to look super cool and also customized for gamer’s.
Table of Contents
Requirements
- Rainmeter Setup download
- Rainmeter Skins download
How to Customize your Desktop (Gaming customized) Windows PC
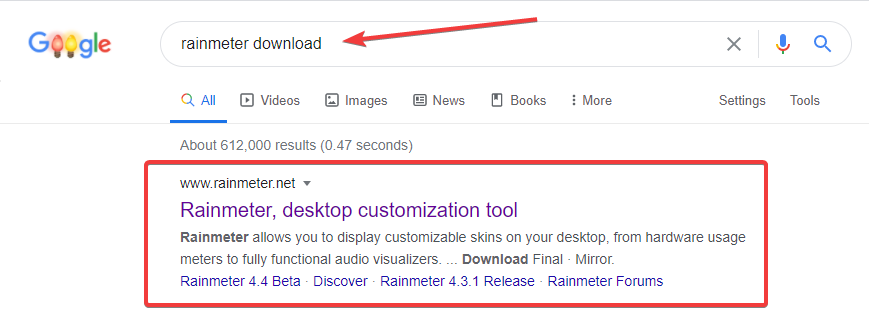
STEP 1: Go to google, search rainmeter download, and click on the first link it will redirect you to the main website.
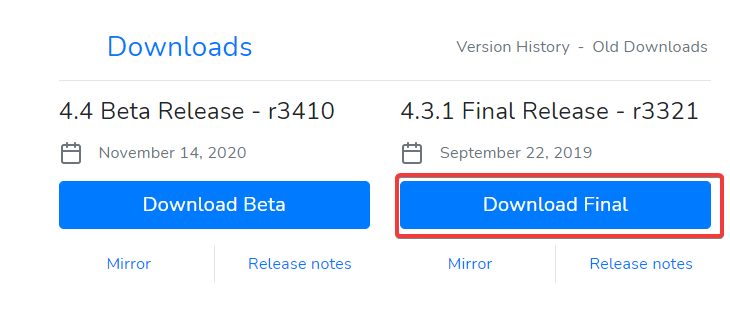
STEP 2: After you are redirected to the website, click on download final. Immediately your browser should grab a download file.
STEP 3: Download the setup file. After the setup file is downloaded, open the setup follow the necessary steps, and finalize the installation.
STEP 4: After finalizing the installation, you will see Rainmeter welcome note on your screen.
STEP 5: Now unload all skins by right-clicking on the welcome note, and then click on unload skins.
STEP 6: After that unload the remaining skins in the part of your desktop, by right clicking on each of them and then unload skins.
STEP 7: After you’ve done all that, right-click on your desktop, click on view, and then un-tick show desktop icon. This will make your desktop icons hidden.
[the_ad id=”420″]
STEP 8: Right-click on your taskbar in the bottom part of your desktop => taskbar settings.
STEP 9: In taskbar settings, On auto-hide taskbar in desktop mode.
How to customize your desktop with Rainmeter (Windows)
STEP 1: Extract the Rainmeter Skins Zip file you downloaded from this website with WinRAR/7zip.
STEP 2: After extraction is completed, Open Rainmeter Skins folder => Skins_01Aug => Desktop images.
[the_ad id=”420″]
Use one of the images in the folder as your desktop background.
STEP 3: Copy the remaining files in the folder, except the images folder.
STEP 4: Go to This PC =>Document =>Rainmeter => Skins.
STEP 5: Paste the folders you copied in Skins Folder.
STEP 6: Close the Skins folder and open Manage Rainmeter, by clicking on the arrow pointing up beside the battery meter in the right bottom part of your desktop. After that, double click on Rainmeter application to Open.
On Manage Rainmeter click on refresh all in the left part bottom of the page.
STEP 7: After clicking on refresh all, it’s now time to position the skins.
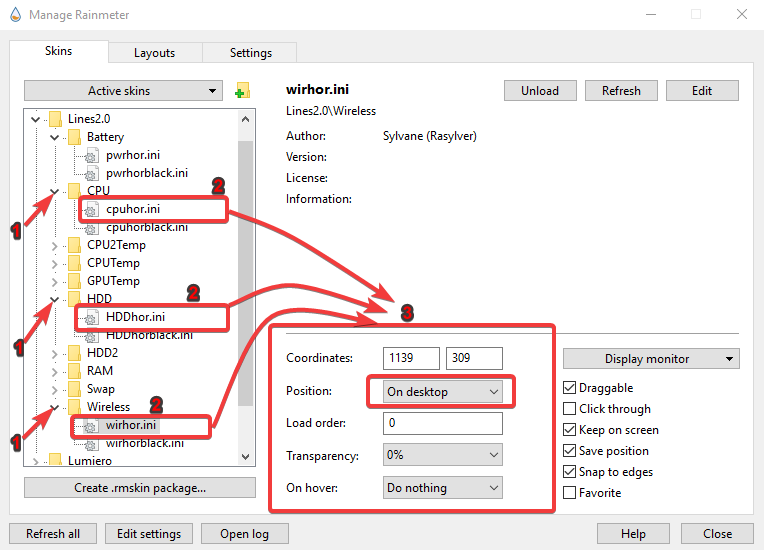
Click on the drop-down on Lines.2.0, after that double click on battery folder and then double click on pwrhor.ini.
STEP 8: In the right bottom part of Rainmeter app, click on the drop-down beside Position and then select my desktop.
[the_ad id=”420″]
STEP 9: Position the new skin to any part on your desktop, but to make it look uniform, position it to the right part on your desktop.
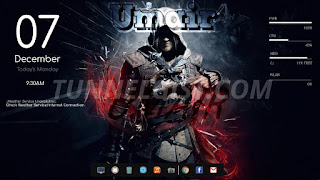
See the image below
STEP 10: Again repeat the same steps for CPU, HDD, and WIRELESS folder.
STEP 11: After arranging the skins to the right part on your desktop.
STEP 12: Close and reopen Manage Rainmeter. Double click on Lumiero folder, in the drop-down section double click on Date folder, after that double click on Date ini.
In the right bottom part, click on the drop-down beside Position and then select my desktop. Position it to the left upper part on your desktop.
STEP 13: Repeat the same steps for Timeand Weather forecast Folder.
Position the remaining skins to the left upper part on your desktop.
See image below
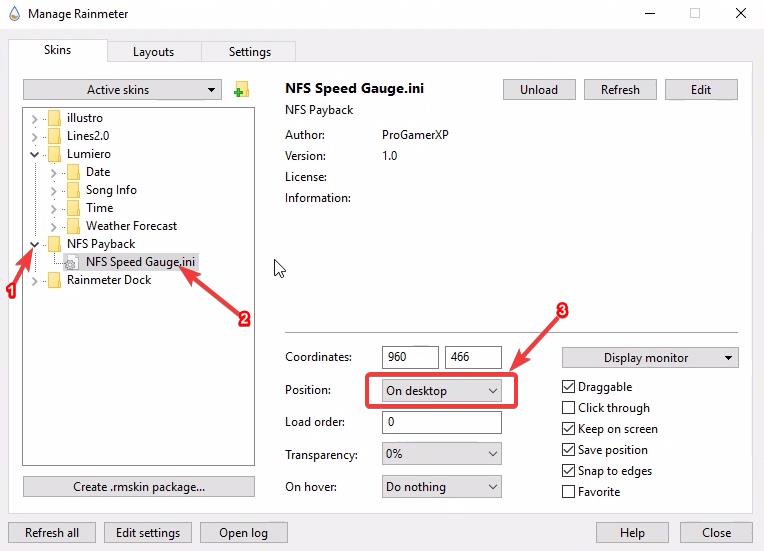
STEP 14: Close and reopen Manage Rainmeter. Double click on the NFS Payback folder, in the drop-down section double click on NFS Speed Gauge.ini.
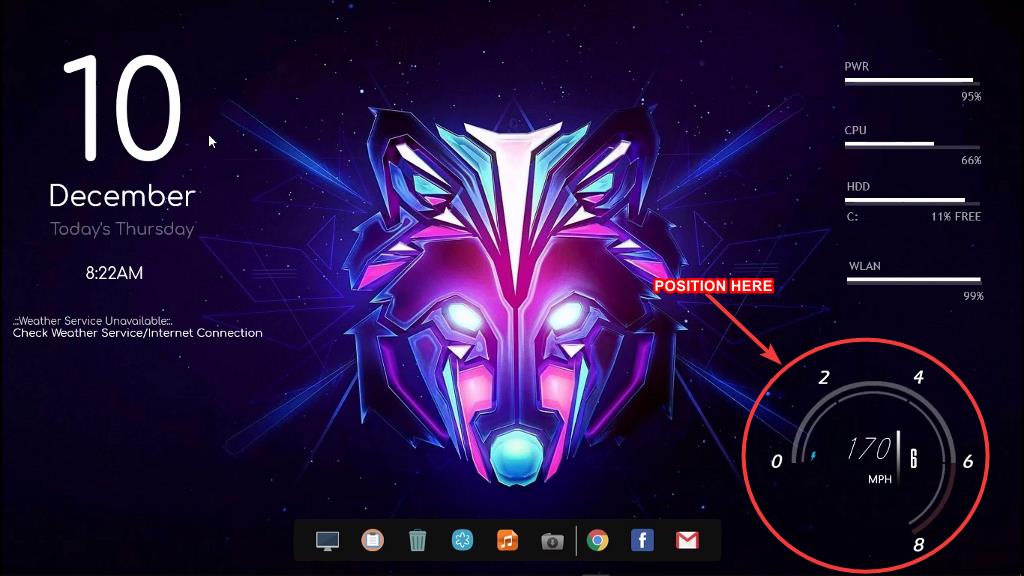
In the right bottom part, click on the drop-down beside Position and then select my desktop. Position it to the right lower part of your desktop.
See image below
STEP 15: Close and reopen Manage Rainmeter for the last time. Double click on Rainmeter Dock folder, in the drop-down section double click on Rainmeter Dock.ini.
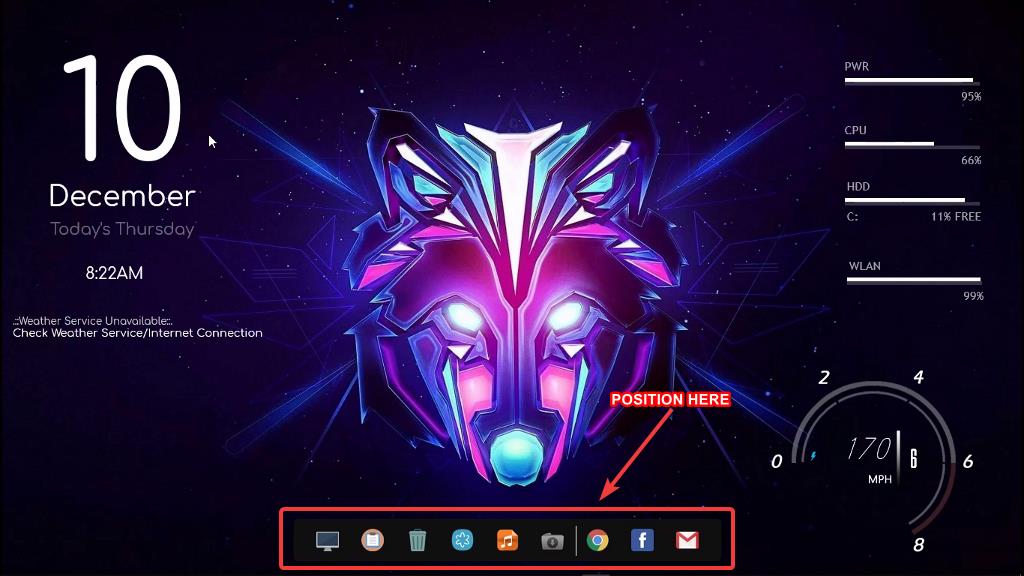
Click on the drop-down beside Position and then select my desktop. Position it to the lower part of your desktop.
See image below
That’s all, hope you enjoy your new desktop look.
If you want to remove Rainmeter customized desktop from your PC, simply uninstall rainmeter app and then make your desktop icon visible.
DESKTOP IMAGE SAMPLES
Read more






![Latest Clean Up Roblox Codes [month] [year]](https://tunnelgist.com/wp-content/uploads/2024/04/ROBLOX-CODES-_20240402_170517_0000-1.jpg)
![Anime rangers Codes [month] [year] – Roblox](https://tunnelgist.com/wp-content/uploads/2024/04/ROBLOX-CODES-_20240402_154736_0000.jpg)
![Asphalt 9 Codes [month] [year]](https://tunnelgist.com/wp-content/uploads/2024/03/WIKI_20240331_152102_0000.jpg)