HOW TO LOCATE OBB FOLDER ON BLUESTACKS 3 AND ALSO MOVE DATA TO OBB FOLDER
Welcome back to another most requested tutorial, how to locate OBB folder on bluestacks 3, and also move data to obb folder. Early 2024 this year I recently did a tutorial on how to locate obb folder on bluestacks 4 and also move data to obb folder, but guess what? The method for locating OBB folder on bluestacks 4 is way different from bluestacks 3, that’s why we wrote this article to help those out that are using the previous version Bluestacks 3.
If you want to learn how to locate obb folder on bluestacks 4 and also move data to obb folder click here, that’s all for that without wasting any more time let’s dive in.
Table of Contents
HOW TO DOWNLOAD AND INSTALL BLUESTACKS 3
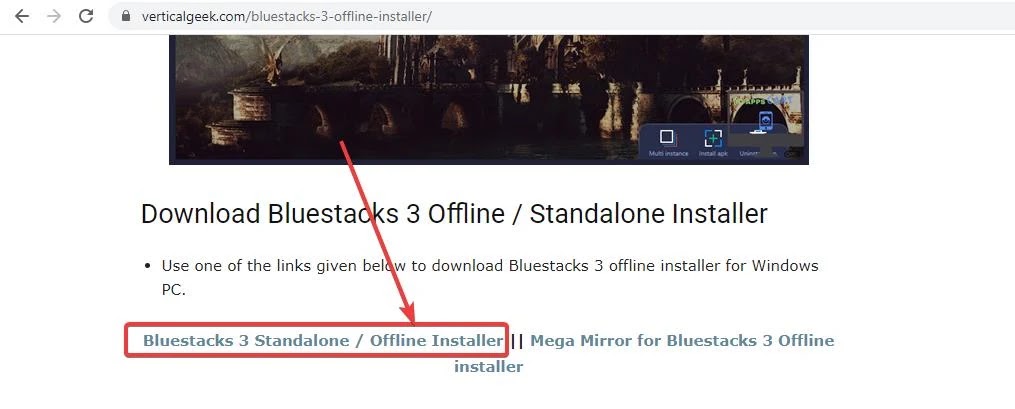
Firstly head on to your browser, type bluestacks 3 standalone installer download verticalgeek on your preferred search engine
After being redirected to the website, scroll down until you see a blue highlighted text with links like this (Bluestacks 3 Standalone / Offline Installer || Mega Mirror for Bluestacks 3 Offline installer)
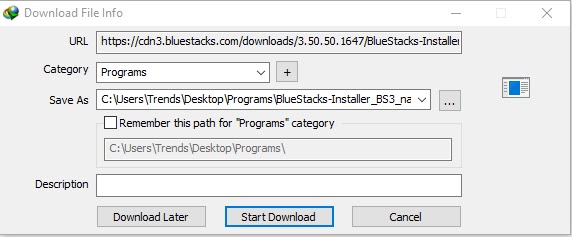
Click on the first link, bluestacks 3 download will immediately begin on your computer, the file size is approximately 262MB or above
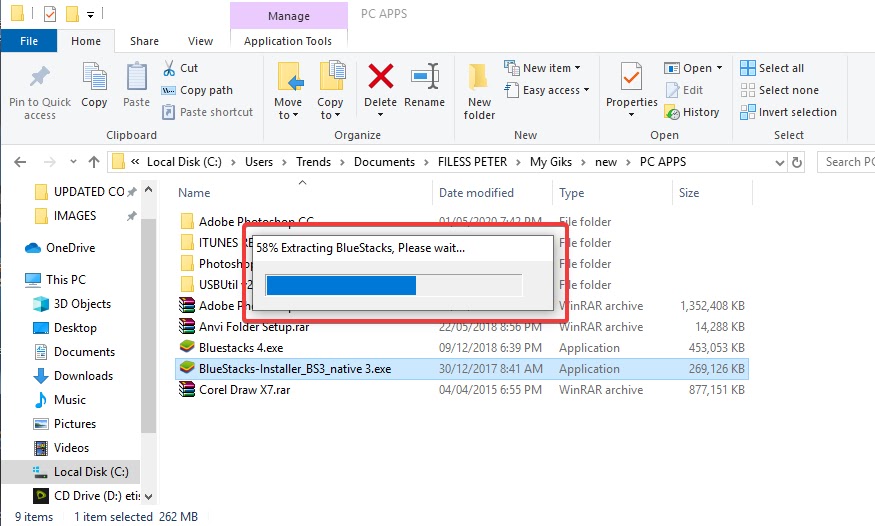
After you are done downloading Bluestacks 3 standalone installer, double click on the setup to start extracting the setup
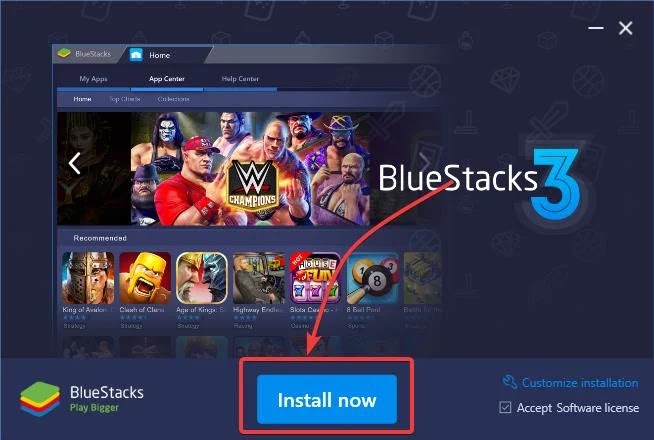
After extracting is done, the main installation process will begin, click on install now to start the installation immediately
Wait for the installation to complete, after the installation is completed click on Finish
After clicking on Finish, bluestacks 3 will immediately restart and redirect you to the loading screen.
Wait for it to load, it takes around 2-5 minutes depending on your PC performance
After loading is completed you will be redirected to the welcome screen, click on Agree and then click on Yes or Not Now to disable or enable location for Google Apps
- Note: Make sure your turn on your Data, because this process requires data
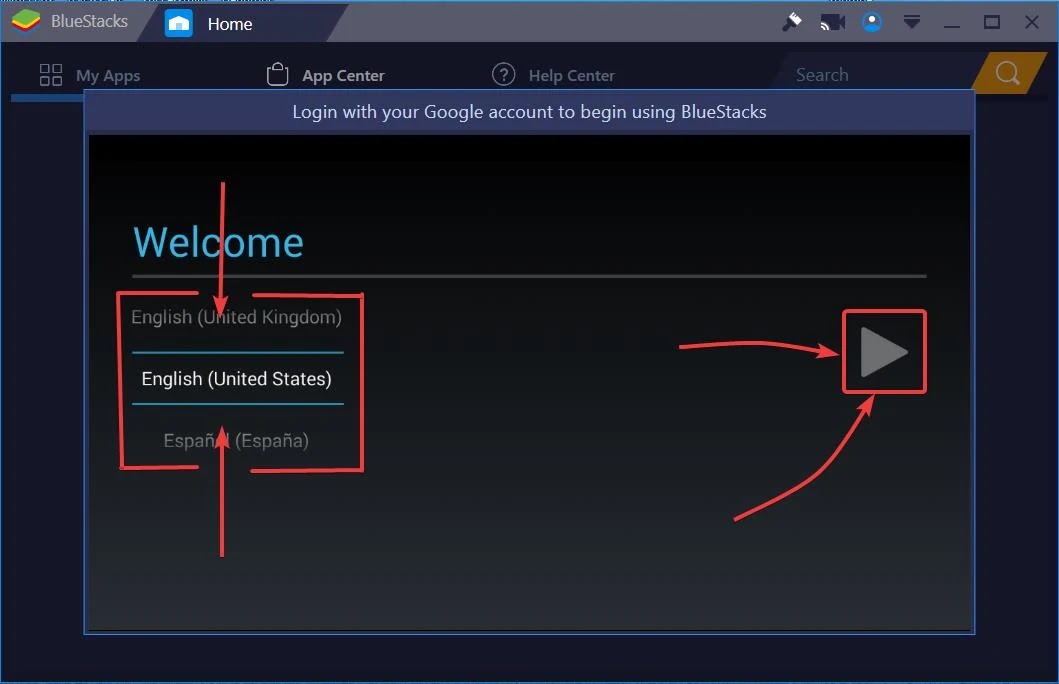
Now you will be on the main welcome screen, double click on the language section in the left corner below Welcome, and slide through to select your language.
After finding your language click on the play logo in the right part of the page to continue
After clicking on the play logo, click on continue
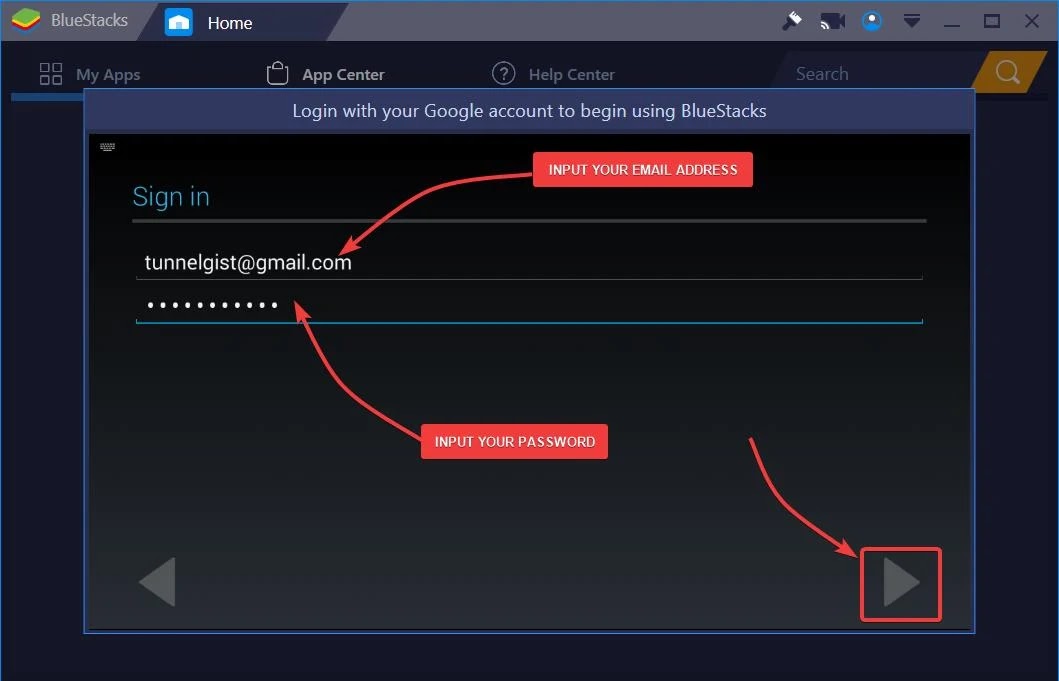
Now you will need to input your valid email address and password, input your valid email address and then click on the play logo in the down-right part of the page to continue
After that click on OK, the sign-in is going to take minutes
After it’s done signing in click on Yes to Enable Access Location or Not Now to Disable Access location
After that click on the play logo below twice, this will redirect you to the form where you will fill your First Name and Last Name
Fill in your First and Last Name, and then click on the Play logo below to continue
After clicking on the Play logo, you will be redirected to the main home screen; you’ve successfully installed Bluestacks 3 on your PC.
HOW TO LOCATE OBB FOLDER ON BLUESTACKS 3 AND ALSO MOVE DATA TO OBB FOLDER
➥The requirement to do this
- Es file explorer Application, click here to download
- The Application that Needs Additional file
HOW TO SHOW HIDDEN FOLDERS ON YOUR PC
Before you get started, make sure you enable hidden folders visible, this will allow you to view hidden folders on your PC
To do this, go to your Administrator
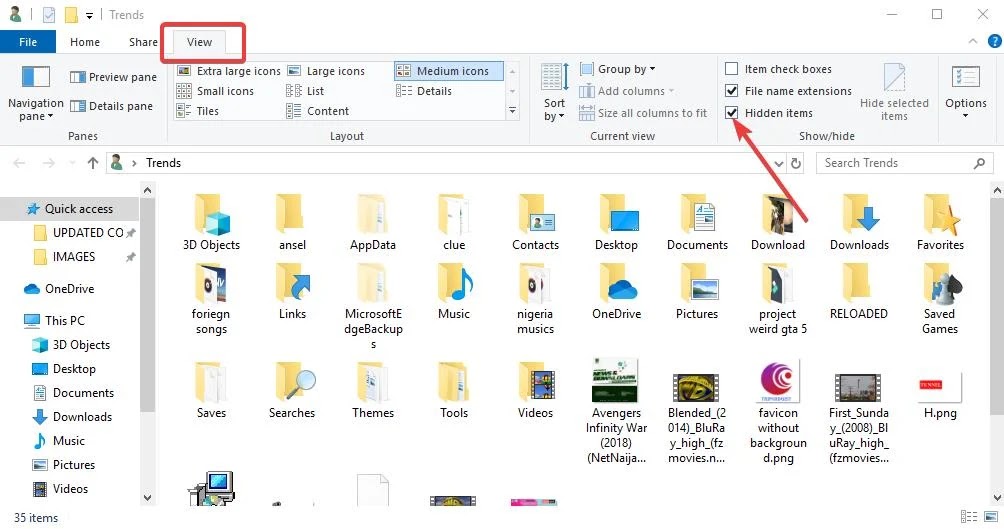
After Administrator folder is being opened up, click on view in the top part of the page and then check on hidden items in the top right part of the page
After you’ve done that you will now see some hidden folders now visible on your PC.
HOW TO LOCATE OBB FOLDER ON BLUESTACKS 3 AND ALSO MOVE DATA TO OBB FOLDER
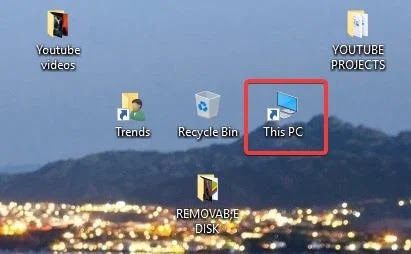
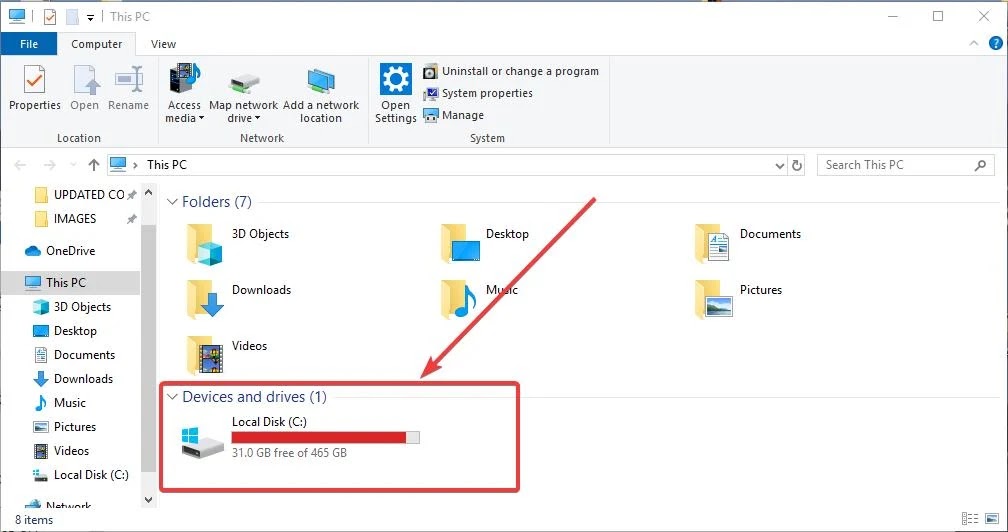
Go to This PC, double click on your Local Disk (C:) to open
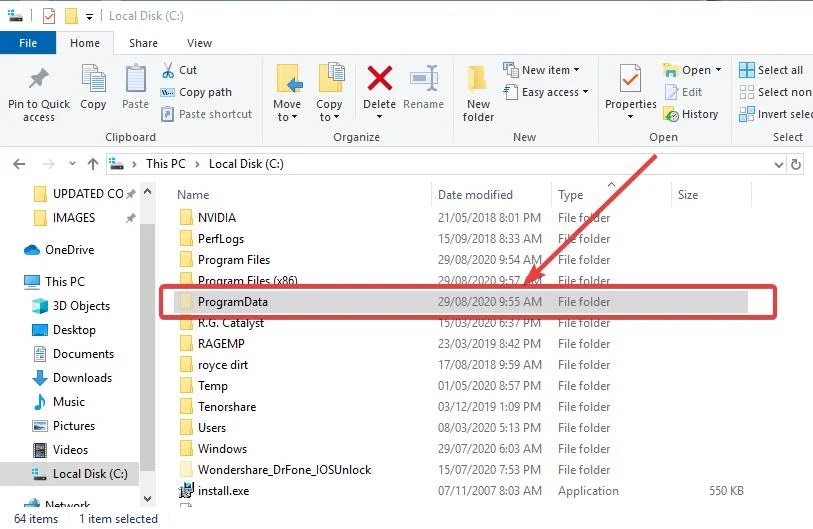
After that scroll down and then double click on ProgramData
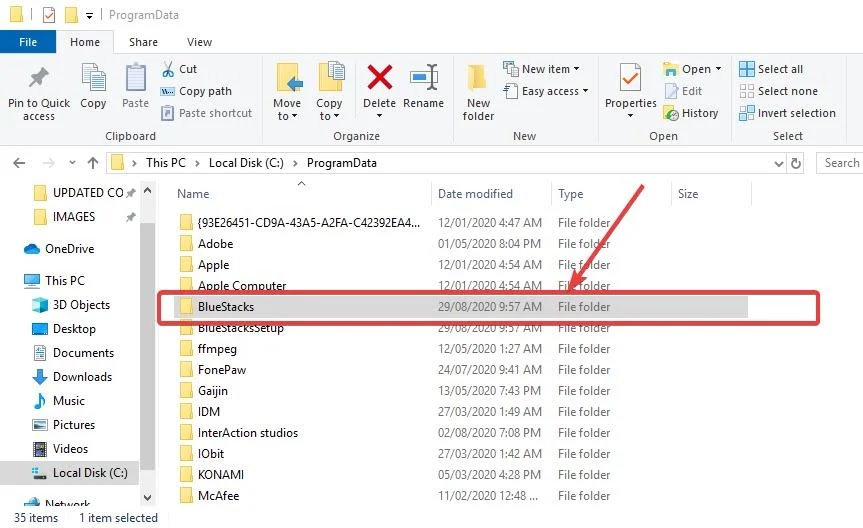
After double-clicking on ProgramData, double click on Bluestacks Folder
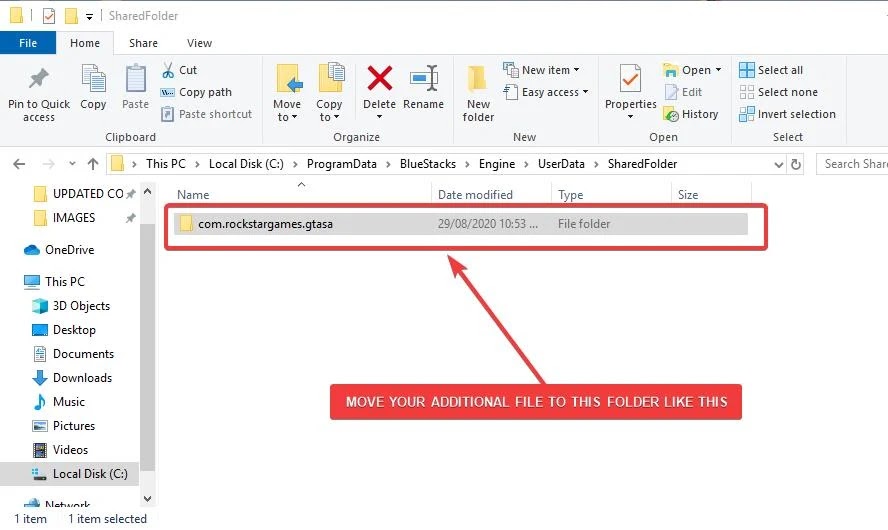
After clicking on Bluestacks folder, double click on Engine ==> UserData and then SharedFolder
- We have just arrived at our destination, copy and paste any additional file folder (Data) to this folder, this is the main folder that gives you access from your computer to Bluestacks 3
After you’ve pasted the Additional file folder on SharedFolder, head back to your desktop and open bluestacks 3 application
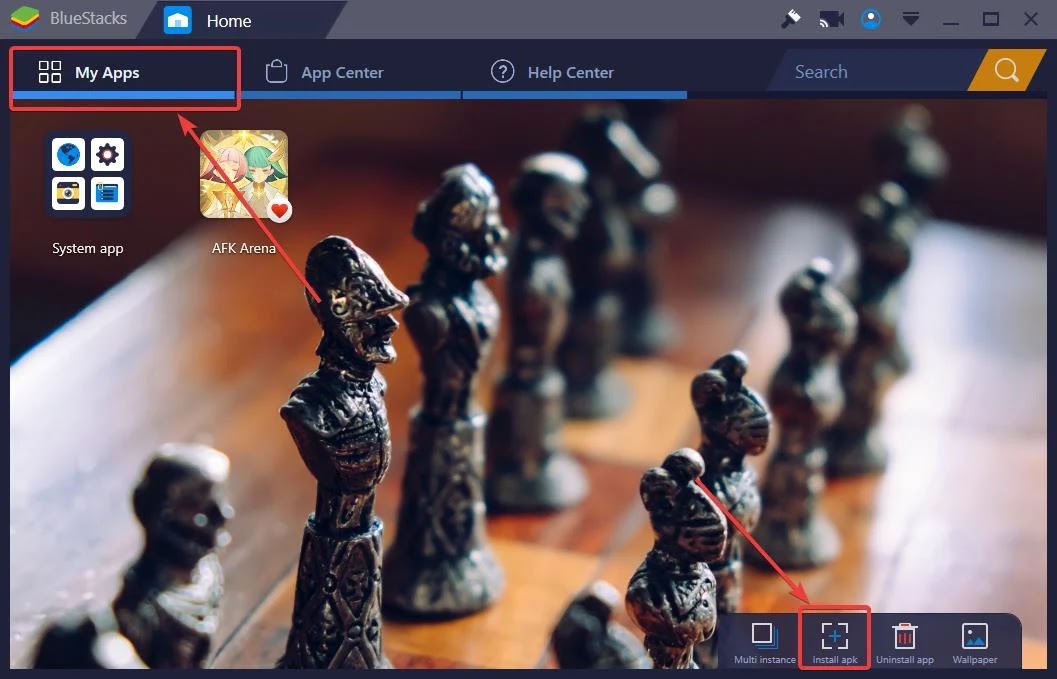
After you have successfully loaded bluestacks 3, click on My Apps and then Install Apk
After clicking on Install Apk, browse and select the location you have Es File Explorer on, which is best preferable to have it on your desktop
If you have Es File Explorer on your desktop, click the left corner to select your desktop
After that scroll down and then double click on Es File Explorer to start the installation process
Do the same for the Apk that requires an additional file, in my case, I’ll be installing Grand Theft Auto San Andreas
After you are done installing both applications, open Es File Explorer on Bluestacks 3
After you’ve opened Es File Explorer, click on the three slashes in the left corner
After that click on Local dropdown and then click on sdcard
You will now be redirected to Bluestacks 3 Android file manager
Now Open Windows folder => BstSharedFolder
The file you see in BstSharedFolder is the file you recently moved to SharedFolder on your Local Disk Drive
Move the folder by double-clicking on it to highlight, and click the three dots in the right corner of the page and then click on Move to
In the Move section, click on Android folder
After clicking on Android folder, click on the Plus logo to create a new folder
Rename the New Folder to obb in lower case and then click on OK
After clicking on Ok, click on obb folder again
And then OK to start moving the file
Before patient, wait for bluestacks 3 to successfully move your files
After your files have been successfully moved, close Es File Explorer and then open the app that requires additional file
Now you’ll see that your Game will be working properly on bluestacks 3 as if you are using your Android Phone.
Related
Conclusion
If this article helps you locate obb folder and also move data to obb folder, please comment down below and also don’t forget to follow us on our social media platforms. AS ALWAYS STAY AWESOME PEACE!







![Latest Clean Up Roblox Codes [month] [year]](https://tunnelgist.com/wp-content/uploads/2024/04/ROBLOX-CODES-_20240402_170517_0000-1.jpg)
![Anime rangers Codes [month] [year] – Roblox](https://tunnelgist.com/wp-content/uploads/2024/04/ROBLOX-CODES-_20240402_154736_0000.jpg)
![Asphalt 9 Codes [month] [year]](https://tunnelgist.com/wp-content/uploads/2024/03/WIKI_20240331_152102_0000.jpg)
If you learned how to locate and also move data to obb folder on bluestacks 3, comment down below and if there is still something you don't understand also comment down below, we'll reply immediately ASAP